 Video accounted for 64% of all Internet traffic this past year. By 2019, experts estimate this number to escalate to 80%. How will you tap into this market?
One great way to do this is to repurpose your current and future web content — especially your blogs post — into educational and entertaining videos.
What’s in it for you? The benefits are clear: If you don’t do online video marketing, you will be missing out on 80% of all web traffic!
And I’m going to make this easy for you — you don’t need to become a master videographer. You simply need to learn some basic concepts and technologies and you’ll be on your way.
By the time we are done here, I will have shown you how to create a video template and repurpose your blog posts into entertaining, informative, and educational videos.
I will lead by example so you can follow along. I will be repurposing the blog post entitled 10 Reasons Businesses Fail at Social Media…and How to Not Be One of Them! into a video for YouTube, Facebook, and I’ll even show you how to upload a teaser video to Twitter.
So, let’s get started.
Step #1: Create the Video Template
The key to creating videos quickly is to have a great template that you can use over and over. Once you have this template and get the process down, you can easily repurpose web content to video in an hour or two.
We are going to use PowerPoint for this. For many (especially beginners who are new to creating video content), this makes things easier because you probably already have a template that you use for presentations.
Here is a picture of my template:
For videos, you want to make sure that your PowerPoint slides are set to 16:9, which will enable a nice viewing experience on YouTube and other video sites. Here are instructions on how to that.
Now that we have the base slide all setup, we are ready to go. I use this base slide to create a few other slides that I will use repeatedly. My PowerPoint document called Video Slide Master.pptx contains just 6 slides that look like this:
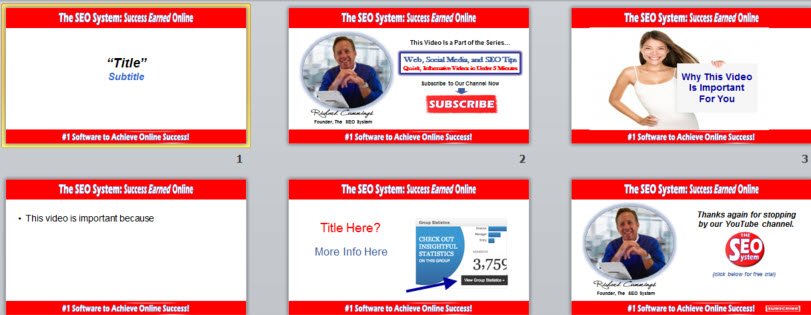
When I am creating a new video presentation, these 6 slides are all I need to begin. I just copy and paste these slides to create new slides based on my new topic. You can see them in use in the final video below.
Step #2: Rearrange & Retitle Your Original Content
One of the reasons that repurposing your web content is such a no-brainer is that you already have the content. You don’t have to reinvent the wheel.
That said, you can’t just present the wheel as is; in other words, you don’t want to just copy and paste.
If you make your video content the exact same as your blog content, they will compete against one another. You want to create a new slant, a new angle for your content that meets the needs of the video market.
Let’s look at my example. As we see above, the original title was 10 Reasons Businesses Fail at Social Media…and How to Not Be One of Them!. This post looked at why small businesses fail on social media.
I decided that my video will take a more positive approach. Rather than look at what small businesses are doing wrong, I decided to approach it from a more positive light: What small businesses can do on social media to improve their Return on Investment.
With that idea in mind, I refer to this title generator article to come up with the best headline for my article.
I came up with this title: 10 Quick Ways to Improve Your Small Business Social Media ROI. And look at the graphic below…the headline analyzer gives me an A+.
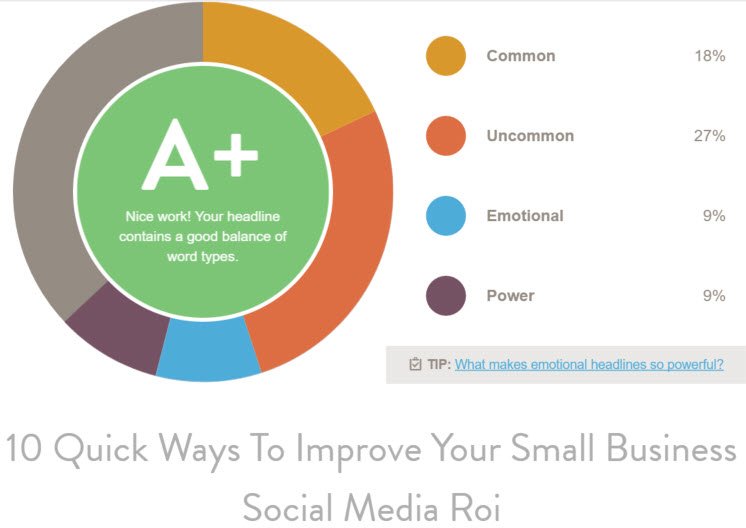
I’m now all set with a new title for my video.
Now I need to get all of the slides in order. For this video, it’s easy. Numbered blog posts with titles such as “10 Methods to…” are very easy to repurpose for video.
Why? Well, you made 10 points in the article so you will have 10 slides illustrating those points. In the case of my example, I will re-word most of the “10 Quick Ways” but the ideas are all there.
Finally, remember to consider the medium — video! I try as best as I can to keep my videos short and sweet. The video audience normally does not stick with a video that labors on and on.
For those viewers who want more detailed information, I include a link below the video that points to the blog post for more in-depth information.
Step #3: Prepare PowerPoint Slides for Video
After you have created all of your PowerPoint slides that will be placed in the video, you’re ready to prepare your slides for video.
This step is simple: We are going to create .jpg files of all of our slides. To do this, we simply use the “Save As” feature in PowerPoint and choose the .jpg format. PowerPoint will then ask you if you want to export every slide as you see below:
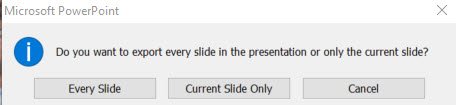
After choosing “Every Slide”, PowerPoint creates a directory with all of your slides in .jpg format.
We will then use these .jpg files in the next step.
Step #4: Create the Video & Audio
Most of you have probably used PowerPoint so the steps above were nothing new. In this step 4, I am going to introduce you to something new: Camtasia Studio.
I have tried all of the freebie video creators on the market and none compares with the ease-of-use and quality-of-end-result to Camtasia studio. Yes, it costs money but let me assure you that your time is worth too much to dabble with all of the freebies out there and discover that they just don’t cut it. Plus, you can try it for free. So, if you’re working as we go, go ahead and try it right now.
We are essentially going to do two things in Camtasia Studio: (1) Import our PowerPoint photos. And (2), add narration to each slide.
To import the PowerPoint slides in Camtasia Studio, you only need to click “Import Media”, locate the directory with all of your slides, select them, and choose open. Once all of the slides are in Camtasia Studio, just drag them down to the “track” area and they will be all setup.
That’s it for the video. You’re good to go.
Now, all you need to do is add narration to your slides. This is accomplished in Camtasia by choosing “Tools | Voice Narration”.
After adding narrations for each slide, you will stretch the slide time to match the length of your narration and — voila! — you will have a full video ready for primetime.
Step #5: Final Video Edits and Uploads
I can’t stress this idea enough — proof your video several times and have others do the same. Once you have produced the final upload, placed it on YouTube or another video site, and begun marketing the video location, it is a PITA (pain in the as..phalt?) to get it fixed.
However, if you identify the errors beforehand, they’re easy to fix.
In my final production of this video, I made one typo (mistaking they’re for their — arggghhh!). As an English major in college, I couldn’t let this basic error go unfixed and I was forced to backtrack several steps. Trust me — check your work before you publish your video because, unlike a blog post, you can’t just quickly go in and remedy a typo in a video.
Once everything checks out, you can easily upload your video directly to YouTube through Camtasia. Camtasia also allows you to produce an .MP4 file, which I always do for direct uploads to locations other than YouTube, such as Facebook and Twitter.
Bonus Step: Video Marketing on Facebook and Twitter
Speaking of Facebook and Twitter, you may want to consider these video marketing tactics.
First, in a great article called 10 Quick Wins for Getting Started Fast with Facebook Video, we read the following: “A video uploaded natively directly in Facebook is more likely to be seen by your audience than links shared to YouTube or other video services.”
This idea has been proven time and again through various studies — your video has a much greater chance of success on Facebook if you upload it directly to Facebook. This is very easy to do on your Facebook page by clicking on the videos tab and clicking “Add Video”. (Note: You may want to modify the title slightly so it’s different from your YouTube version.)
Also, if you intend to advertise your video, you may want to add a graphically oriented slide to the very beginning of the video. Facebook applies heavy restrictions to text in ads and videos are no exception. If your video thumbnail is too text intensive (over 20%), you will not be allowed to use the thumbnail in your Facebook ad. Alternatively, if you have completed the video and don’t want to modify it, you can simply create a new graphical image for the video thumbnail.
For Twitter, video marketing works a little bit differently. You are allowed to place a 30 second video clip on Twitter.
Now don’t worry…you do not have to go back and create a separate 30-second video clip. Twitter allows you to upload your entire video and then trim it to the best 30 seconds. Then, within your Tweet, you can link to the full video if applicable.
Think you can’t capture an audience in 30 seconds? Check out this “Damn Daniel White Vans” 30 second clip that has been retweeted and liked over 700,000 times.
Get creative with your marketing ideas and perhaps you can be the next Daniel!
Appendix: Example – The Blog Post Converted Into a Video
Finally, here is the working example of creating a video from a blog post.
Article Comments: I always enjoy hearing what our readers think. Does your company implement video marketing? Will this article get you going? Do you have any questions about converting your written web content to video? Sound off in the comments section below. I respond to all comments that come in. Cheers, Richard

As Founder of The SEO System, Richard delivers strategic consulting and builds high-performing teams that drive measurable growth, search authority, and long-term search equity.
Richard is currently accepting select clients for SEO and AEO consulting. Learn more at https://richardcummings.info/consulting.html
- The AI Inconsistency Gap: Why Your Brand is Winning on Google but Losing the “Answer War” - February 26, 2026
- The Personal Assistant Pivot: Optimizing for AI Search and AEO in 2026 - February 26, 2026
- The Ultimate Guide to Dental SEO: How to Rank Higher & Attract More Patients - March 10, 2025